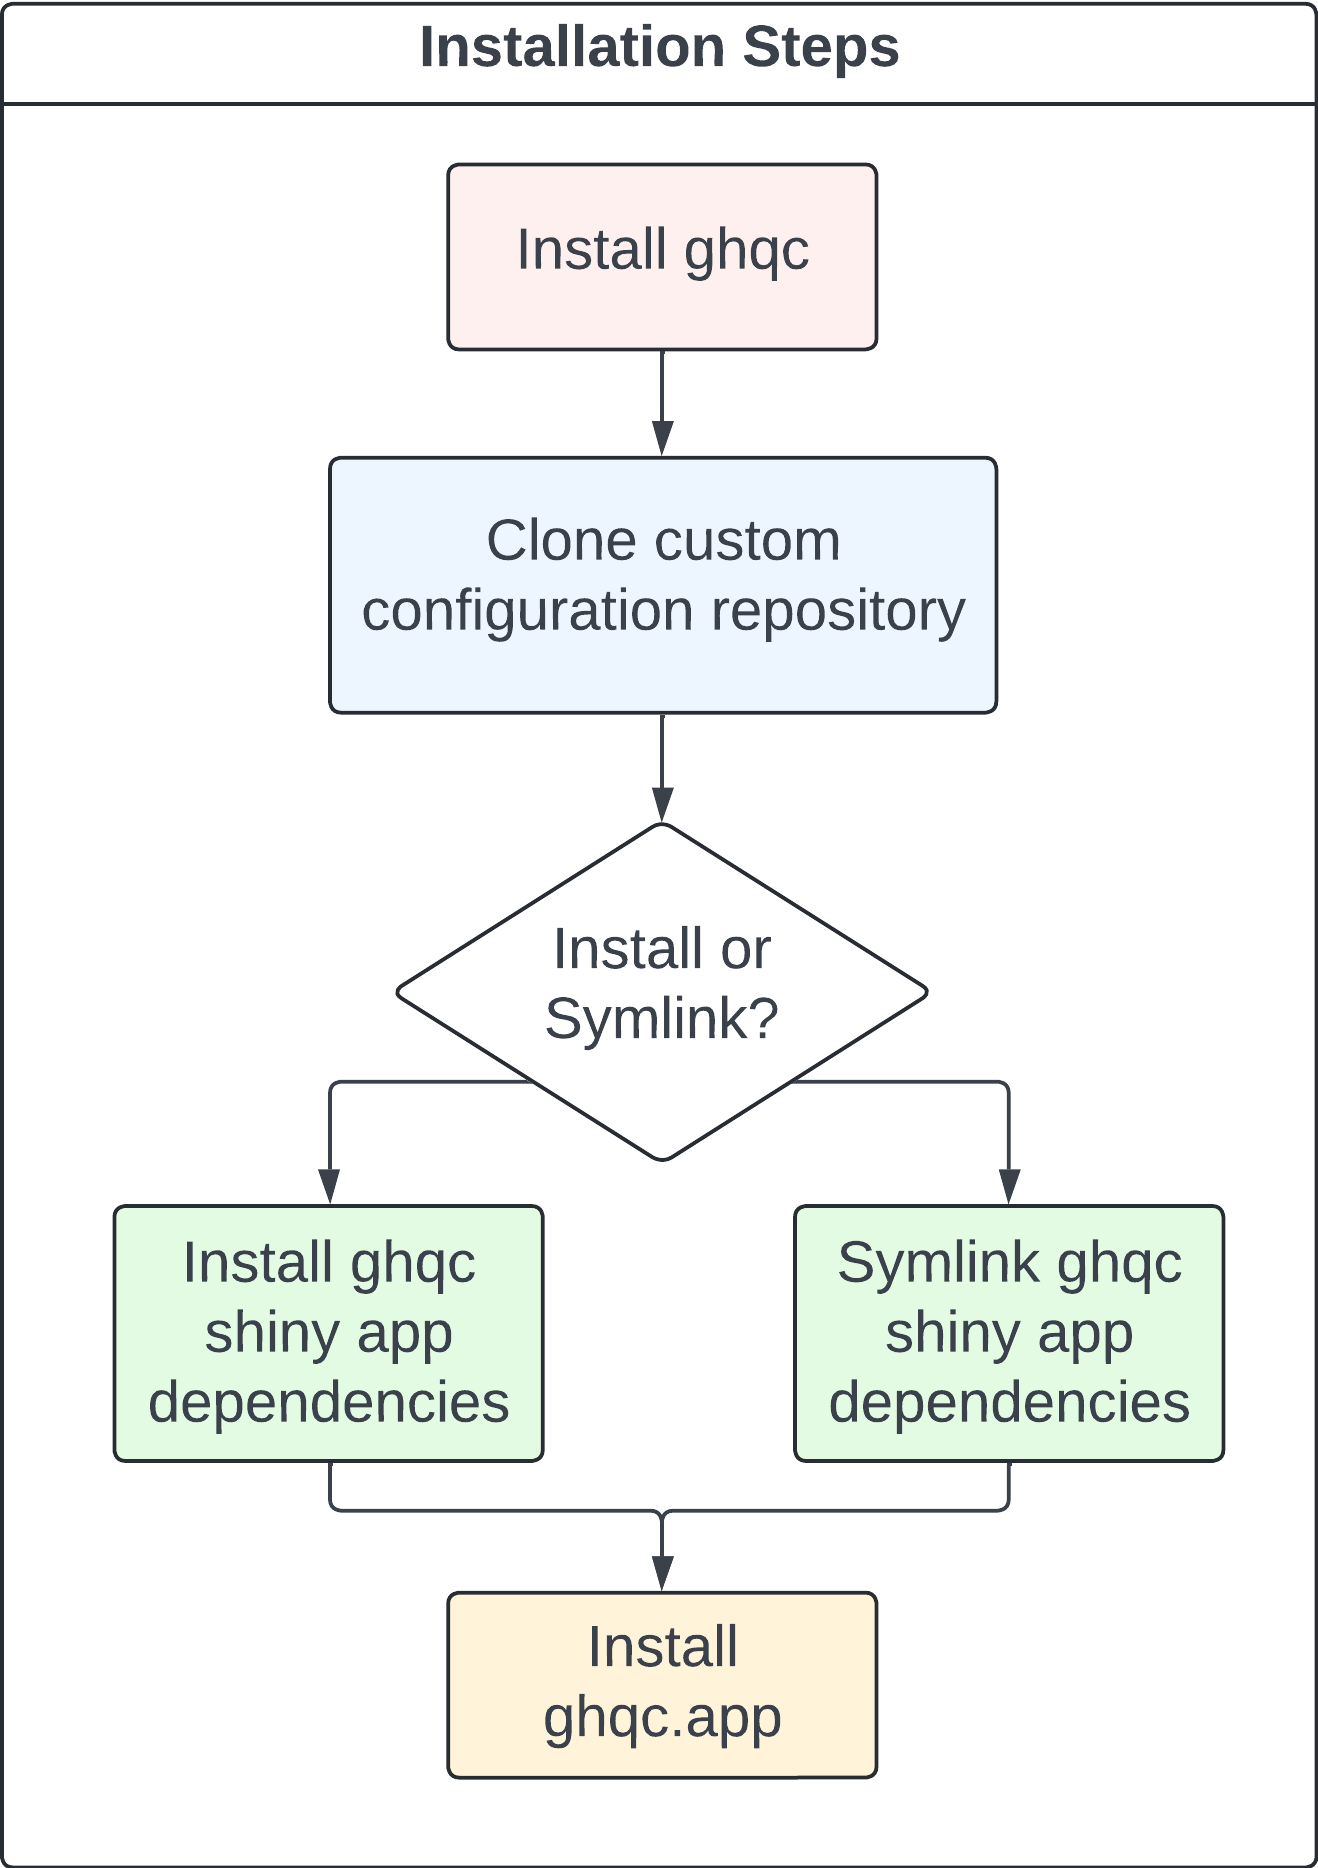
To try out ghqc without your organization’s custom configuration options, run the following
commands to install the ecosystem and clone an example custom configuration repository.
Set options to a CRAN-like repository with the ghqc ecosystem (this allows the setup function to install ghqc.app, an auxiliary helper package)
Next, a prompt will appear for the local directory in which to clone the repository.
The default location is according to the XDG Base Directory specification, with a subfolder based on the repository name.
To install to the default directory, which is highly recommended, input y. If a different location is required, input the file path.
If you have not downloaded the repository before, the following prompt will appear. Input y to download.
Terminal window
x Custom configuration repository ghqc.example_config_repo is not found locally
Would you like to download the repository (y/N)? y
Not Up To Date
If the repository has been downloaded previously, but it is not up to date with remote, the following prompt will appear.
If there are local changes to the repo, pulling remote changes is not required. Input y to download the update.
Terminal window
x Custom configuration repository ghqc.example_config_repo was found locally,
but is not the most recent version
Would you like to update the repository? This will delete all local changes to
~/.local/share/ghqc/ghqc.example_config_repo (y/N) y
Up to Date
If the repository is downloaded and up to date, you will be provided with the following:
Terminal window
Custom Configuration Repository found up to date at
~/.local/share/ghqc/ghqc.example_config_repo
After a successful download, the structure of the repository is verified for its compatibility with the ghqc ecosystem.
This includes structural validation of each yaml checklist.
Terminal window
✔ logo.png successfully found
✔ options.yaml successfully found    ✔ prepended_checklist_note:
    “Note: Please modify checklist items to insert relevant QC context.”    —
✔ Checklist directory successfully found    ✔ advanced_checklist.yaml    ✔ simple_checklist.yaml
ghqc.app dependency installation
To ensure ghqc.app dependencies do not interfere with project work, ghqc.app and its dependencies are installed in an isolated directory outside the QCed project.
A prompt will appear to install or link the ghqc.app package dependencies.
If you are on a linux operating system, ghqc will install the dependencies from PPM@2024-03-01
After inputting 1, the user is prompted for the local directory in which to install ghqc.app dependencies.
To install to the default directory, which is highly recommended, input y.
If a different location is required, input N to enter the file path.
Terminal window
Install ghqc.app dependencies to path:
~/.local/share/ghqc/rpkgs/linux-ubuntu-jammy/R-4.4/x86_64-pc-linux-gnu (y/N) y
ghqc will check the content of the directory to ensure the correct packages and versions are installed.
If no packages are found, you will be prompted the following:
Terminal window
x No packages found in ~/.local/share/ghqc/rpkgs
Would you like to install the ghqc.app dependencies (y/N)? y
If some packages are not found, or require updates, you will be prompted the following:
Terminal window
x Some dependency packages in ~/.local/share/ghqc/rpkgs may not be
found or require updates
Package Installed_Version Recommended_Version
waldo NA 0.5.2
withr 2.5.2 3.0.0
Would you like to install or update the above packages (y/N)? y
If all packages are installed, you will be provided with the following:
Terminal window
✔ All dependency packages in ~/.local/share/ghqc/rpkgs are up to date
If you have a package library previously installed, containing all of the package versions required, symlinking will be the fastest option as it does not have to install anything.
After entering 2, you will be prompted to where to symlink the dependency packages from on your system.
Terminal window
Path to previously installed package library from which to link:
You will then be prompted with where to symlink the dependencies to. To set the destination as the default directory, which is highly recommended, hit ENTER.
If a different location is required, you are able to enter the file path.
Terminal window
Path to link the ghqc.app dependencies (~/.local/share/ghqc/rpkgs)
In order to prevent errors, the current content in the destination is deleted and then the symlink occurs:
Terminal window
Linking ghqc.app dependency packages...
Removing all packages in ~/.local/share/ghqc/rpkgs...
✔ All packages in ~/.local/share/ghqc/rpkgs were successfully removed
✔ All 148 ghqc.app dependency packages were linked to
`~/.local/share/ghqc/rpkgs` in 0.53 secs
To skip ghqc.app dependency installation in the interactive session, input 3.
A helper function ghqc::ghqc_libpath() exists to create, if needed, and output the string to the default dependency directory.
Install ghqc.app
At the end of the ghqc.app dependency installation, the following note will print if ghqc.app is not installed in the ghqc directory.
Terminal window
! NOTE: ghqc.app is not installed in ~/.local/share/ghqc/rpkgs.
Please install before running any ghqc apps
If it is not an available package in the user’s options("repos"), ghqc.app is not installed as part of ghqc::ghqc_setup().
Manually install ghqc.app with the following command: